#GWアドベントカレンダー 「1つサービスを作る」の7日目記事 Herokuへdeploy
以下の GWアドベントカレンダー 「1つサービスを作る」の7日目記事です。
とりあえず出来たものをHerokuにdeployしていきます。
ソースの変更
Herokuのアカウントは作ってある、そしてHerokuのCLIツールはインストール済みとします。
まずは定番のGemfileの編集です。
sqlite3 をdevelopment groupに移し、新しくproduction groupを作り、そこに移動します。
group :development, :test do
  # Call 'byebug' anywhere in the code to stop execution and get a debugger console
  gem 'byebug', platforms: [:mri, :mingw, :x64_mingw]
  # Use sqlite3 as the database for Active Record
  gem 'sqlite3', '~> 1.4'
end

group :production do
  gem 'pg'
end
そしてインストールします。
bundle install
なお --without productionを付けてないのは--withoutがDEPRECATEDだからです。
次にデータベースの設定を変更します。
config/database.ymlを変更します。
production:
  <<: *default
  database: db/production.sqlite3
とあるので、これを変更します。
production:
  <<: *default
  adapter: postgresql
  encoding: unicode
  pool: 5
最後に、config/environments/production.rbのconfig.assets.compileをtrueに変更します。
config.assets.compile = true
Gitの初期化
ローカル環境のGitを初期化しておきます。
git init
git add -A
git commit -m 'Initial commit'
Herokuへdeploy
Herokuにログインします。
heroku login
ブラウザが起動するのでログインします。
Herokuでアプリの作成をします。
これは1回だけ実行します。
heroku create
heroku remote -v
Herokuのdeploy先が表示されればOKです。
deployする。
git push heroku master
多少のワーニングが出るが気にしない。
データベースをMigrationする。
heroku run rails db:migrate
Twitterの設定変更する
Callback URLをheroku createしたときに出た場所に変更する。
https://deployした場所.herokuapp.com/users/auth/twitter/callback
動作確認
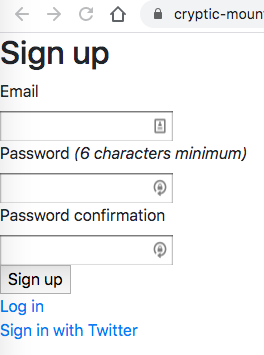
https://deployした場所.herokuapp.com/users/sign_up/ にアクセスするとdeployができていることが確認できます。

Sign in with TwitterをクリックするとSign inが出来ました。

まとめ
railsでdeviceとomniauth-twitterとbootstap4を使ってHerokuへのdeployまでができました。
完成には、まだ遠いのですが、ベースの仕組みはできたので、なにかに使えればいいですね。
余計なサービスなども、そのうちやっていきますが、今回のGWアドベントカレンダーは、ここで終わりにします。
#GWアドベントカレンダー 「1つサービスを作る」の6日目記事 アクセスコントロール対応
以下の GWアドベントカレンダー 「1つサービスを作る」の6日目記事です。
昨日作った更新URLに、アクセスコントロールを追加します。
アクセスコントロール
app/controllers/users_controller.rb を編集し先頭に1行追加します。
before_action :authenticate_user!, only: [:edit, :update]
authenticate_user!をbefore_actionに入れることで認証されたユーザーのみがアクセスできるようになります。
editとupdateが対象で、showは誰でもアクセスさせたいのでonly: [:edit, :update]とします。
動作確認
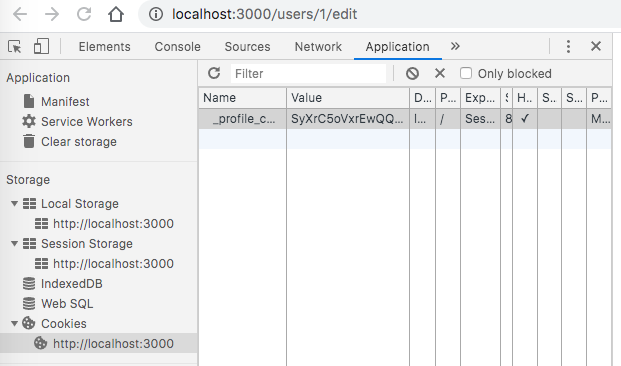
http://localhost:3000/users/1/edit にアクセスしてDeveloper toolを起動しApplicationのCookiesから認証されたCookieを削除します。

画面をリロードすると、サーバーログではUnauthorizedとなっていることが確認できます。

#GWアドベントカレンダー 「1つサービスを作る」の5日目記事 情報の追加2
以下の GWアドベントカレンダー 「1つサービスを作る」の5日目記事です。
情報の追加をしていきます。
具体的にはプロフィール画面に、ウェブサイト情報などを追加したのは読めたのですが、更新ができないので更新します。
更新
app/controllers/users_controller.rb を編集しupdateを追加します。
  def update
    @user = User.find(params[:id])
    if @user.update(websites_params)
      flash[:success] = "Websites updated"
      redirect_to @user
    else
      render 'edit'
    end
  end

  private

  def websites_params
    params.require(:user).permit(websites_attributes:[:title, :url, :id])
  end
ここでは permitで更新したい関連テーブルをwebsites_attributes:シンボルで指定します。
これでwebsitesテーブルだけを更新します。
app/views/users/show.html.erb も更新し<p><%= @user.twitter %></p>の下に以下の変更点を追記します。
    <table class="table table-responsive">
      <% @user.websites.each do |w| %>
        <tr>
          <td>
            <%= w.title %>
          </td>
          <td>
            <%= w.url %>
          </td>
        </tr>
      <% end %>
    </table>
#GWアドベントカレンダー 「1つサービスを作る」の4日目記事 情報の追加1
以下の GWアドベントカレンダー 「1つサービスを作る」の4日目記事です。
情報の追加をしていきます。
具体的にはプロフィール画面に、ウェブサイト情報などを追加できるようにしていきます。
Webサイトテーブル
Webサイトテーブルを作ります。
rails generate model website user:references title:string url:string kind:integer sort:integer
忘れずに userモデルにhas_manyを追加します。
class User < ApplicationRecord
  has_many :websites, dependent: :destroy
  accepts_nested_attributes_for :websites

  # 途中省略
end
データベースを初期化しておきます。
rails db:migrate:reset
編集画面
編集画面を作ります。
app/controllers/users_controller.rb を編集します。
  def edit
    @user = User.left_joins(:websites).find(params[:id])
  end
ここでは websitesテーブルを外部結合で呼び出しています。
app/views/users/edit.html.erb を新規作成する。
<div class="container">
  <div class="media">
    <a href="<%= @user.twitter %>" class="align-self-start mr-3">
      <img src="<%= @user.image %>">
    </a>
    <div class="media-body">
      <h5 class="mt-0"><%= @user.name %></h5>
      <p><%= @user.description %></p>
      <p><%= @user.website %></p>
      <p><%= @user.twitter %></p>

      <%= form_with model: @user do |f| %>
        <%= f.fields_for :websites do |w| %>
          <div class="form-row">
           <div class="form-group col-md-4">
             <%= w.label :title %>
             <%= w.text_field :title %>
           </div>
           <div class="form-group col-md-4">
             <%= w.label :url %>
             <%= w.text_field :url %>
           </div>
          </div>
        <% end %>
        <%= f.submit "更新", class: "btn btn-primary" %>
      <% end %>
    </div>
  </div>
</div>
accepts_nested_attributes_for :websitesとしているので、viewでfields_forが使用可能となっています。
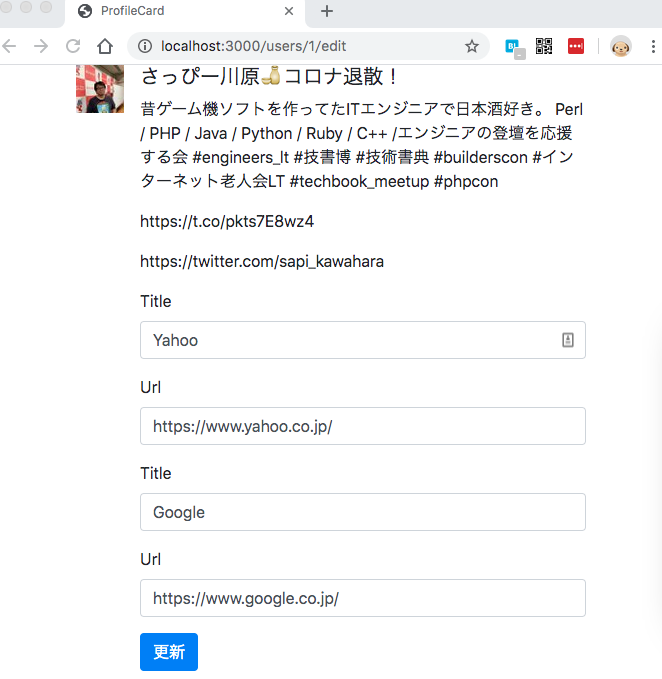
http://localhost:3000/users/sign_up/ で再び認証をかけてから、websitesテーブルに直接データを2レコード打ち込んでおき、そして http://localhost:3000/users/1/edit にアクセスすると編集画面が登場しました。

余談
予定通り進んでないです。
延長線になると思います。
#GWアドベントカレンダー 「1つサービスを作る」の3日目記事 Bootstrap4適用
以下の GWアドベントカレンダー 「1つサービスを作る」の3日目記事です。
Bootstrap4を適用していきます。
ログイン後のリダイレクト
やり残したことを対応します。
after_sign_in_path_for はログイン後のリダイレクト先、after_sign_out_path_forはログアウト後のリダイレクト先です。
app/controllers/application_controller.rb に追記します。
class ApplicationController < ActionController::Base
  private

  def after_sign_in_path_for(resource)
    user_path(resource)
  end

  def after_sign_out_path_for(resource)
    root_path
  end
end
参考にしました。
bootstrapに対応
Railsで使うにはドキュメントにあるように gem 'bootstrap', '~> 4.4.1'を行えば良いようです。
getbootstrap.com
しかし、色々と調べてみると、一番良いのは、こちらのドキュメントでしょうかね?
Gemfile に2つのgemを放り込みます。
gem 'bootstrap', '~> 4.4.1'
gem 'jquery-rails'
そしてbundle installする。
次にapplication.cssをapplication.scssにリネームする。
mv app/assets/stylesheets/application.css app/assets/stylesheets/application.scss
app/assets/stylesheets/application.scss を編集して@import "bootstrap";を追記する。
そして、JSのディレクトリが無いので作成する。
mkdir -p app/assets/javascript/
その後、app/assets/javascript/application.jsを以下の内容で新規に作成する。
//= require jquery3
//= require popper
//= require bootstrap
動作確認
app/views/users/show.html.erb を以下のように編集します。
bootstrap メディアオブジェクトを適用します。
<div class="media">
  <a href="<%= @user.twitter %>" class="align-self-start mr-3">
    <img src="<%= @user.image %>">
  </a>
  <div class="media-body">
    <h5 class="mt-0"><%= @user.name %></h5>
    <p><%= @user.description %></p>
    <p><%= @user.website %></p>
    <p><%= @user.twitter %></p>
  </div>
</div>
そして rails サーバーを再起動してTwitterログインすると、プロフィール画面が少しだけきれいに表示されました。
